You may have heard of the phrase ‘bedroom tone’ – usually applied as an insult: “Man, that guitarist had a sweet Tele Custom, but the worst bedroom tone I ever heard”. There can be a lot of misunderstanding as regards amp equalization & what constitutes good tone, and it’s my opinion that knowing how your amplifier works is as essential as knowing how to tune your guitar. For bass players, it is often difficult to be heard alongside even one good-sized guitar amplifier, let alone a pair of Marshall/Mesa/HiWatt stacks set to 11! Read the rest of this entry »
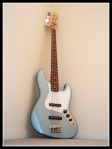
 I originally posted this article on the OzBass forums a few months ago. ‘Debbie’ (as in Harry, from Blondie) & I didn’t see eye to eye, so she has since gone to a more appreciative home. I’d have loved to keep her, just to gaze lovingly at, but I’m a player, not a collector!
 This was the stock wiring; random pots with 6mm shafts, and a .1 uF capacitor (versus the more typical .047 uF used in Precision basses). The pots were okay, but the .1 uF capacitor is just a bit too woolly for my tastes – you don’t get a lot of signal left over 400 Hz when you roll the tone back all the way. Read the rest of this entry »
 As per a suggestion on the TalkBass forums, I re-ran the tests with my pink noise sample turned down around -10dB. Many pedals are not designed to accept the high level of input from my first test & will respond differently (it’s the same thing that happens when you run certain pedals in an amp’s fx loop).
Currently residing on my workbench is an old Guyatone BB-1 Flip Valve “Bass Driver” pedal, on loan from OzBass forum user Crayzeebass. It’s fairly heavily influenced by the BK Butler / Chandler Tube Driver, (made famous by a Mr David Gilmour of a little band called Pink Floyd you may have heard of) and runs on 9 volts. He’d purchased it from another forumite, but commented to me that it lost a bit of his tone. I’d been curious to try it out (it has a neat semi-parametric mid control), and he’s local, so he dropped it off to me for to have a look-see. Read the rest of this entry »
Coming soon: how not to make a guitar case! Okay, a little pessimistic, but I certainly went the hard way about it. Also, I’ll finally finish my MIDI bass pedals and I have a job to refurbish an old Guyatone BB-1 Flip Valve pedal.
c-
I’m going to say this up front: as a child of the 70’s, I got into music in the 80’s. I got my first turntable at age 8, back in ’84. I missed Jaco first time around, and although I respect where he took the electric bass, I have never really got into him since.
Anyway, Bill Wyman of the Rolling Stones is generally accredited with being the first guy to defret a fretted electric bass, and his bass playing is pretty much as solid as you could ever want. There’s also some sweet and subtle fretless work in Pink Floyd (“Hey You” “Learning to Fly” “A Pillow of Winds”), but probably THE reason for me getting the fretless bug was Pino Palladino’s utterly killer bass playing in “I’m Gonna Tear Your Playhouse Down” by Paul Young. Bakithi Khumalo’s bass lines on Paul Simon’s “Graceland” certainly helped fuel the fire.
Now, this _was_ going to be a triumphant finale to Part I, where I unveil my finished creation… but I’ve been having second, and third, thoughts. Mostly due to the extra hassle of lugging the keyboard around to bass gigs, and my continued difficulty in finding another cheap MIDI capable keyboard without velocity sensitivity.
I mentioned in Part I that my bright idea of using a VGA cable fell over due to the cable only having 8 conductors plus shielding ground. The solution was to go back to a world of pre-USB comms cables; the humble parallel cable has plenty of conductors for the job at hand.
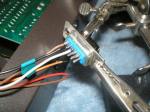
I scored a couple for free at a local computer store, and it was a simple matter of cutting the ends off & connecting one end up to my VGA plug, and the other to the foot pedal assemblage. Easy peasy. For the record, parallel cable has 19 conductors – this means you could use an octave-and-a-half bass pedal unit to extend your range.
However, I must fess up to having done something pretty effing stupid: during the final construction of the bass pedal assembly, I put a nail through the comms cable. That severed 4 of the conductors, requiring its removal & re-wiring. Notice I said nail, not screw – this is the other part of my stuff-up: it’s impossible to easily unassemble the case I made for the bass pedals.
Given the amount of work required to salvage this project, I’m thinking of going back to my original plan… that’s right: the DX21 is going under the knife. I already have all my jumper leads wired up ready to connect to the bass pedal contacts – the question is whether or not the DX21 parts will fit in the case as built. I don’t think they will, so a rebuild is probably in order.
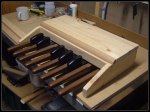
So, to re-iterate: the method I used in Part I is absolutely sound. During the pre-assembly testing, my re-wired parallel cable + VGA plug work exactly as planned, enabling the playing of the bottom octave on both the keyboard & the bass pedals. The picture here shows the almost completed bass pedals, just before I attached the lid & decided to nail in a piece of wood to protect the contacts from the cable…
I have a bit of work on the go (my latest endeavour involves making true bypass loop pedals), but I’m determined to knock this on the head ASAP!
c-
This is inspired by the 1976 Moog Taurus I bass synthesizer – a 13 note synth that you play with your feet, used notably by the Police & Rush amongst others. I have a tendancy towards progressive music, so these appeal to me. I’d found a few alternatives like the Roland PK5 MIDI pedals, which can be hooked up to any MIDI synth, but those were all just about as expensive as the Moog in the first place. Then I found that a few people had made their own, using old organ bass pedals and cheap keyboards, and the hook was well and truly set.
I knew that in order to make a set of MIDI bass pedals I would need a MIDI capable synth to hack up, but one without velocity sensitive keys. That is, there is only note on/note off (anybody else get Mr Miyagi there, or Yoda?) signals. I asked around, and posted a request on the Ozprog.com forums. I eventually got a reply, and for AUS $50 I picked up a Yamaha DX21 with two sticky keys but in otherwise good condition.
The DX21 is a poor man’s DX7 – it’s a 4 operator FM synth, with 8 note polyphony and enough presets & user savable patches to be interesting. Like all FM synths, they seem to inspire a love/hate relationship here on the internet. It comes in a nice steel case, except for the plastic end caps.
One neat feature is that you can split the keyboard and use two separate patches, or stack (and detune!) two patches – this works a treat with a good bass or lead sound! Needless to say, given my fondness for strays, I didn’t want to sacrifice the whole keyboard just to make my bass pedals. But I still didn’t want to shell out US $100 for the BASYN MIDI kit… what to do?
I opened up the DX21 to have a look inside, and fix the sticky keys. There’s a lot of screws to remove, as the circuit boards, keyboard contact boards & keys are all attached to the frame separately. Keep a container handy – I use inverted CD spool cases. There’s a few different sizes, so if you’re in danger of getting confused it wouldn’t hurt to make a few notes, or even better, take some pictures.
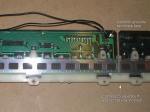
In the picture titled “Innards”, you can see the main circuit board which will need to be removed. This exposes the contact board (brown, with the diodes visible on the underside) which is the main point of interest. You’ll want to unplug the jumper leads to make it easier to work with the board, they’re easy enough to re-attach later.
Note that the keyboard contacts are on two separate boards, which are attached to the main circuit board by jumper leads. It would be very easy to disconnect the larger (treble end) board if you wanted to cut this synth down to fit it into a smaller casing. Simply cut through the plastic bracket where indicated, and unplug the jumper leads from the larger board.
Mounting everything else into the new case is going to be trickier; the easiest thing to to would be to leave the synth on a basic patch & never change it. That way, the only thing you need to surface mount is the MIDI out & power switch. The total size of the box is then constrained only by the largest circuit board.
Regarding the sticky keys, all I had to do was remove the keyboard assemblage from the casing & pop out the offending keys. It turned out that the rubber guides that fit inside the keys and keep them in place had deformed a little over time. I took a stanley knife and shaved away about a millimetre of the side; this freed them up enough that they now spring up as normal when released. This was also the time to clean out all the cobwebs and cockroach shit that was in there…
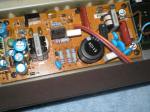
Hey, while I’m thinking about it, how about a SAFETY WARNING? Avoid, where possible, touching anything relating to the power supply. Any large capacitors (see those honking great black ones?) can hold voltage for quite some time after the power is removed. You wouldn’t want to get a shock just because you were being cheap, after all.
This sort of keyboard works by the keys manually pressing down on a conductive strip, which links a common ground to the positive end of the circuit, letting current pass through the diode you can see on the PCB.
I had a brainwave: it doesn’t matter how that connection is made, so what if I ran some jumper leads from the common grounds, and from the downhill side of the diodes? All I have to do is make those two ends touch, and the circuit is completed. By breaking those leads out to a socket, I can make similiar arrangements on the bass pedals.
Being that the DX21 groups it’s notes in 12s, I needed 2 common ground wires (one for the bottom C, one for the next 12 notes) and 13 hot wires, making 15 conductors in all. But where to find an easily available 15 conductor cable? BINGO: the common VGA monitor lead. Durable, easily found & replaced and best of all, cheap!
Edit: well, the VGA sockets worked great. VGA cable, however, has 5 common pins… don’t worry though, I found a replacement that was just as cheap. More detail in the next post.
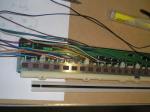
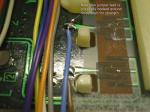
So, after firing up the soldering iron, it was a slow but simple process of wiring different coloured hookup wire jumper leads between the diode & positive contacts of the lowest 13 keys, and black leads from each of the two ground pads. Where I double up on colours, I used a loop of tape to differentiate. If you’re doing something like this, allow plenty of length in case you have issues routing the leads later. In this picture you can clearly see the conductive strips, like interlocking fingers, and the two ground traces in the bottom right (under the bit of foam).
The real pain in the ass came when I had to then wire those 15 jumper leads into the back of the VGA socket. Make sure you don’t over-tin the ends, or they won’t fit in the lugs. Once that was soldered up, I made a note of which lead was soldered to each lug – this is so you can match up the corresponding leads in the bass pedals. I’m a big fan of cable ties; I used three to keep all the jumper leads together (and out of the pitch bend / mod wheel assemblies) and managed to get one under a chassis screw to keep them from flopping around.
Next up came a task I was not looking forward to: drilling a hole in the chassis for the VGA socket. The DX-21 has a lovely steel case, and I suspect I may have dulled my favourite step-bit (normally used for drilling aluminium cases) trying to make a decent sized hole or two. In the end, I could see that it was going to be easier to jigsaw a slot into the edge of the chassis & slide the socket in. Well, the jigsaw blade bounced about so much that it dislocated the mechanism. I opened up the jigsaw & popped everything back into place, and was barely able to finish the job… kind of.
I then spent the best part of an hour filing the slot to shape, removing burrs and blowing/vacuuming all the metallic dust out of the DX21 (shorts are bad, mmmkay?). I used a pair of self-tapping metal screws to hold the socket in place, then realised I need to vacuum the thing out _again_ before I reassembled everything.
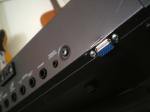
Hmm, well – it’s not as tidy as I would have liked, but it’s functional. If I were doing this again, I’d probably just wire a VGA cable straight in rather than use the socket. It’s a lot easier to drill a circular hole than to make a parralellogram! You can always use an extension cable if the one you wire in isn’t long enough… anyway, enough regrets, it’s time for the moment of truth.
A quick cross-your-fingers moment ensued as I fired the DX21 up for the first time. Mostly I was concerned that I’d caused a short somewhere with some steel filings, or fried one of those diodes while soldering. No worries though, the synth plays as normal on the lowest octave despite my butchery modifications.This is great – I’m now using it as an interface for my Novation A-Station rack synth.
Next step: the bass pedals.
c-
Just had a breakthrough tonight, involving a AUS $50 Yamaha DX21 and a free set of organ pedals… Given that this is a generally poorly documented process on the intarwebz, I’m looking forward to posting this in great detail!
c-


